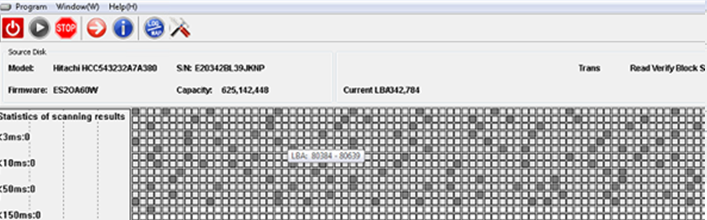
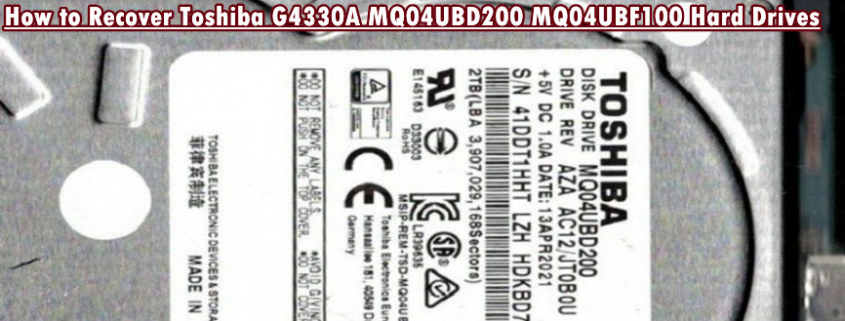
Watch the video here on how to recover the lost data from Rosewood A5 ST2000LM007 with the following error messages in the COM terminal.
Boot 0x80M
QB
Rst 0x80M
T:0x0002 0x4A901760
Srv DETCR init 0x0000
FTU
(P) SATA Reset
RAW OFF
PASS
(DOS Table) Worst Count: 00000000 At SU: FFFFFFFF NT: 00000000 OT: 00000000
RECOV Servo Op=0195 Resp=0005
FAIL Servo Op=06DF Resp=0007
06DF 0000 0000 0000 0000 0000 0000 0000 0000 0000 0000 0000 0000 0000 0000 0000 0000 0000 0000 0000 0000 0000 0000 0000 0000 0000 0000 0000 0000 0000 0000 0000
ResponseFrame 0003 0001 0000 4507 0008 0000 0000 0000 0C44 0000 0000 0000 0000 0000 1C14 0C24 0000 0000 0000 0000 0000 0000 0000 0000 0000 0000 0000 0000 0000 0000 0000 0000 FFFF Loop=2247
DSC FAIL
FAIL Servo Op=000E Resp=000B
000E 0000 0000 0000 0000 0000 0000 0000 0000 0000 0000 0000 0000 0000 0000 0000 0000 0000 0000 0000 0000 0000 0000 0000 0000 0000 0000 0000 0000 0000 0000 0000
ResponseFrame 7F6C 0000 7F6C 0000 7F6E 0000 7F6E 0000 7F6E 0000 7F6D 0000 7F6D 0000 7F6C 0000 0000 0000 0000 0000 0000 0000 0000 0000 0000 0000 0000 0000 0000 0000 0000 0000 0000
Starting LBA of RW Request=00094BDD8F Length=00001C77
ProcessRWError -Read- at LBA 00094BE9C2 Sense Code=43110081
FAIL Servo Op=000E Resp=000B
000E 0000 0000 0000 0000 0000 0000 0000 0000 0000 0000 0000 0000 0000 0000 0000 0000 0000 0000 0000 0000 0000 0000 0000 0000 0000 0000 0000 0000 0000 0000 0000
ResponseFrame 0000 0001 0000 42EB 7F6E 0000 7F6E 0000 7F6E 0000 7F6D 0000 7F6D 0000 1C14 0000 0000 0000 0000 0000 0000 0000 0000 0000 0000 0000 0000 0000 0000 0000 0000 0000 FFFF
ProcessRecoveryComp-2
ERC TO exceeded, orig value in us:FFFFFFFF
MS Read Fails: 4A5EEC78,0000E3B8
RECOV Servo Op=01A5 Resp=0005
Xor this IOEDC Syndrome with Host LBA to find actual sector written = 00007580
FAIL Servo Op=06DF Resp=0007
06DF 0000 0000 0000 0000 0000 0000 0000 0000 0000 0000 0000 0000 0000 0000 0000 0000 0000 0000 0000 0000 0000 0000 0000 0000 0000 0000 0000 0000 0000 0000 0000
ResponseFrame 0000 0008 0000 38F8 0272 0000 0273 0000 0374 0000 0274 0000 0273 0000 1FF2 0000 0000 0000 0000 0000 0000 0000 0000 0000 0000 0000 0000 0000 0000 0000 0000 0000 FFFF Loop=2247
DSC FAIL
FAIL Servo Op=01A5 Resp=0007
01A5 FDE4 0001 7FFF 7FFF 7FFF 0017 102E 4F53 0000 8000 5300 FFFF 02E0 0000 0000 0000 02BC 2871 0000 0000 9900 419B A037 0000 7008 0000 0000 0000 0000 0000 0000
ResponseFrame 0010 0010 0000 ED61 7F71 0000 7F71 0000 7F72 0000 7F72 0000 7F72 0000 1FF2 0000 0000 0000 0000 0000 0000 0000 0000 0000 0000 0000 0000 0000 0000 0000 0000 0000 FFFF Loop=2247
FAIL Servo Op=06DF Resp=0007
06DF 0000 0000 0000 0000 0000 0000 0000 0000 0000 0000 0000 0000 0000 0000 0000 0000 0000 0000 0000 0000 0000 0000 0000 0000 0000 0000 0000 0000 0000 0000 0000
ResponseFrame 000F B200 F8A4 0126 EE00 0A10 F501 6094 EEB8 0AC0 F708 FE26 F604 01BC F201 40AC F708 FE20 F504 6380 EDD3 0A2A ED93 1A2B EEB4 0AE0 EEF1 FA10 BFC8 EEB0 0000 0000 0000
DSC FAIL
RECOV Servo Op=01A5 Resp=0005
Search IOEDC Index = 00012740 Index Offset = 00000000
VBMIndex With IOEDC Error =00012740
Uint32 Offset= FFFFFFFF Bit Mask= EEEEEEEE
HostLBA = 000000004A5EEC78
Previous VBM Index = 0002173F
929C1A24 6DCE856D D24C936F 3BDCFC44 CF672598 C1EA773F F819B7C5 6FF9EE16
F5304876 358761C9 EE2ADAA3 C392D8A0 9BCD6CCC 69A0539B 94E40179 374FD572
819E93AA DD5D4C25 BAB125D7 6B68C71C B7ABB600 31763EF7 A34248AD DF05B1AE
5C64DADE 65132881 491F6F0B 333EA278 423601B4 D8CC2553 7F2893E1 66DB9C0A
68C32412 0CE917FD 65E5B6BF DAF48ED4 1E9C48E8 6082018F 0BB6DD15 0E907B66
04A96F46 D4BFF259 304001F3 624D7530 2D7A921C 0858ECEB 261D2449 D66667C2
D337B6FA 7C75DEB4 CC2E4B27 0A03506F F9C0DD50 D02ECB46 F2FB6FFD 7E3C4239
EF92002E 07CBC510 98B4925B ADD93CCB 95AF2484 7BE4B7A2 8141B931 01F22E95
BA784B62 AF81A04C B712DD8F 75AF1B27 A0356E38 03BA921E 5D2C0065 A94815F1
56C69296 77578CA8 43F924C3 1D650783 7C93B96C AB73797A 698A4B99 711EF02D
62ACDDCA 1F2C6B04 1E476E77 A53BE2FF 0B7E00A0 72C965D6 041092CD 18D4DC89
310B277E A6E25660 2A2DB9AB 4CF1C95B 27C44BD4 1A9F4032 D0FEDC01 A0AABBE4
CD916EB2 4EB832DF C68800DF 1447B5B6 F3A29508 A2552F69 EF4527B5 4860A640
987FB9E6 160E193B 95164A13 BC1D9012 8E08DCBC 4A2B0BC5 BB236EE9 103682BC
B4DA031A B9C40597 A1FC9547 47D27F4E 5A9727F0 EDE1F621 5789B81D BB8F6918
40A04A4E 419AE0F3 7C5ADCFB EFA85BAA 697D7124 B5B7D29D 62140351 43455474
621436F1 43455474 5BE52704 00000000
VBM Index IOECC Error =00012740
929C1A24 6DCE856D D24C936F 3BDCFC44 CF672598 C1EA773F F819B7C5 6FF9EE16
F5304876 358761C9 EE2ADAA3 C392D8A0 9BCD6CCC 69A0539B 94E40179 374FD572
819E93AA DD5D4C25 BAB125D7 6B68C71C B7ABB600 31763EF7 A34248AD DF05B1AE
5C64DADE 65132881 491F6F0B 333EA278 423601B4 D8CC2553 7F2893E1 66DB9C0A
68C32412 0CE917FD 65E5B6BF DAF48ED4 1E9C48E8 6082018F 0BB6DD15 0E907B66
04A96F46 D4BFF259 304001F3 624D7530 2D7A921C 0858ECEB 261D2449 D66667C2
D337B6FA 7C75DEB4 CC2E4B27 0A03506F F9C0DD50 D02ECB46 F2FB6FFD 7E3C4239
EF92002E 07CBC510 98B4925B ADD93CCB 95AF2484 7BE4B7A2 8141B931 01F22E95
BA784B62 AF81A04C B712DD8F 75AF1B27 A0356E38 03BA921E 5D2C0065 A94815F1
56C69296 77578CA8 43F924C3 1D650783 7C93B96C AB73797A 698A4B99 711EF02D
62ACDDCA 1F2C6B04 1E476E77 A53BE2FF 0B7E00A0 72C965D6 041092CD 18D4DC89
310B277E A6E25660 2A2DB9AB 4CF1C95B 27C44BD4 1A9F4032 D0FEDC01 A0AABBE4
CD916EB2 4EB832DF C68800DF 1447B5B6 F3A29508 A2552F69 EF4527B5 4860A640
987FB9E6 160E193B 95164A13 BC1D9012 8E08DCBC 4A2B0BC5 BB236EE9 103682BC
B4DA031A B9C40597 A1FC9547 47D27F4E 5A9727F0 EDE1F621 5789B81D BB8F6918
40A04A4E 419AE0F3 7C5ADCFB EFA85BAA 697D7124 B5B7D29D 62140351 43455474
6214740E 43455474 28C154D6 00000000
Next VBM Index = 00012741
929C1A24 6DCE856D D24C936F 3BDCFC44 CF672598 C1EA773F ^z
F819B7C5 6FF9EE16
F5304876 358761C9 EE2ADAA3 C392D8A0 9BCD6CCC 69A0539B 94E40179 374FD572
819E93AA DD5D4C25 BAB125D7 6B68C71C B7ABB600 31763EF7 A34248AD DF05B1AE
5C64DADE 65132881 491F6F0B 333EA278 423601B4 D8CC2553 7F2893E1 66DB9C0A
68C32412 0CE917FD 65E5B6BF DAF48ED4 1E9C48E8 6082018F 0BB6DD15 0E907B66
04A96F46 D4BFF259 304001F3 624D7530 2D7A921C 0858ECEB 261D2449 D66667C2
D337B6FA 7C75DEB4 CC2E4B27 0A03506F F9C0DD50 D02ECB46 F2FB6FFD 7E3C4239
EF92002E 07CBC510 98B4925B ADD93CCB 95AF2484 7BE4B7A2 8141B931 01F22E95
BA784B62 AF81A04C B712DD8F 75AF1B27 A0356E38 03BA921E 5D2C0065 A94815F1
56C69296 77578CA8 43F924C3 1D650783 7C93B96C AB73797A 698A4B99 711EF02D
62ACDDCA 1F2C6B04 1E476E77 A53BE2FF 0B7E00A0 72C965D6 041092CD 18D4DC89
310B277E A6E25660 2A2DB9AB 4CF1C95B 27C44BD4 1A9F4032 D0FEDC01 A0AABBE4
CD916EB2 4EB832DF C68800DF 1447B5B6 F3A29508 A2552F69 EF4527B5 4860A640
987FB9E6 160E193B 95164A13 BC1D9012 8E08DCBC 4A2B0BC5 BB236EE9 103682BC
B4DA031A B9C40597 A1FC9547 47D27F4E 5A9727F0 EDE1F621 5789B81D BB8F6918
40A04A4E 419AE0F3 7C5ADCFB EFA85BAA 697D7124 B5B7D29D 62140351 43455474
6214740F 43455474 B3954DD8 00000000
DiscLBA on or before IOEDC Error = 094BDD8F
Starting LBA of RW Request=00094BDD8F Length=00001C77
ProcessRWError -Write- at LBA 00094BDD8F Sense Code=44808780
FAIL Servo Op=01A5 Resp=0003
01A5 FDE4 0001 7FFF 7FFF 7FFF 0017 102E 4F53 0000 43E8 5300 FFFF 02E0 0000 0000 0000 02BC
UnvRdStatus1: 0x00004500
UnvScntLdData: 0x0000004B
SrvVrtSectNum: 0x0000013C
MmValidServo: 0x00000000
MmExtServoNum: 0x00000000 2871 0000 0000 9900 419B A037 0000 7008 0000 0000 0000 0000 0000 0000
ResponseFrame 0010 0001 0000 D877 EE00 0A10 F501 6094 EEB8 0AC0 F708 FE26 F604 01BC 1FF2 40AC F708 FE20 F504 6380 EDD3 0A2A ED93 1A2B EEB4 0AE0 EEF1 FA10 BFC8 EEB0 0000 0000 FFFF Loop=204E
RECOV Servo Op=06DF Resp=0005
DSC PASS
PrgF
FAIL Servo Op=01A5 Resp=0007
01A5 FDE4 0001 7FFF 7FFF 7FFF 0017 102E 4F53 0000 8000 5300 FFFF 02E0 0000 0000 0000 02BC 2871 0000 0000 9900 419B A037 0000 7008 0000 0000 0000 0000 0000 0000
ResponseFrame 0010 0010 0000 99AF EE00 0A10 F501 6094 EEB8 0AC0 F708 FE26 F604 01BC 2213 40AC F708 FE20 F504 6380 EDD3 0A2A ED93 1A2B EEB4 0AE0 EEF1 FA10 BFC8 EEB0 0000 0000 FFFF Loop=2243
FAIL Servo Op=01A5 Resp=0007
01A5 FDE4 0001 7FFF 7FFF 7FFF 0017 102E 4F53 0000 8000 5300 FFFF 02E0 0000 0000 0000 02BC 2871 0000 0000 9900 419B A037 0000 7008 0000 0000 0000 0000 0000 0000
ResponseFrame 0010 0010 0000 E4FB EE00 0A10 F501 6094 EEB8 0AC0 F708 FE26 F604 01BC 2213 40AC F708 FE20 F504 6380 EDD3 0A2A ED93 1A2B EEB4 0AE0 EEF1 FA10 BFC8 EEB0 0000 0000 FFFF Loop=2247
FAIL Servo Op=01A5 Resp=0007
01A5 FDE4 0001 7FFF 7FFF 7FFF 0017 102E 4F53 0000 8000 5300 FFFF 02E0 0000 0000 0000 02BC 2871 0000 0000 9900 419B A037 0000 7008 0000 0000 0000 0000 0000 0000
ResponseFrame 0010 0010 0000 579B EE00 0A10 F501 6094 EEB8 0AC0 F708 FE26 F604 01BC 2213 40AC F708 FE20 F504 6380 EDD3 0A2A ED93 1A2B EEB4 0AE0 EEF1 FA10 BFC8 EEB0 0000 0000 FFFF Loop=2247
¢�¢�� ���¢��¢�¢� ¢� ¢????????????��
Bad cmd: 0x1A1A
> �
Boot 0x80M
Tech Unlock Handshake: 0x824B6834
Reply:
QB
Rst 0x80M
T:0x0002 0x4A901760
Srv DETCR init 0x0000
FTU
(P) SATA Reset
RAW OFF
PASS
MS Read Fails: 4A5EEC78,0000E3B8
RECOV Servo Op=01A5 Resp=0005
Out:
Unretryable write error
MSP Guard Band Fails: E9F6FA88,00000AD8
MSP213
(MC POR Duration): 0000001050
RECOV Servo Op=0195 Resp=0005
DSC PASS
RECOV Servo Op=0195 Resp=0005
Intel 6G->3G
Send Status: COMRESET seen
CSpd= 3Gbps
ASCII Diag mode
F3 T>^z
ASCII Diag mode
F3 T>
RECOV Servo Op=0095 Resp=0005
DSC
RECOV Servo Op=0195 Resp=0005
RECOV Servo Op=0195 Resp=0005
RECOV Servo Op=0195 Resp=0005
RECOV Servo Op=0195 Resp=0005
^z
RECOV Servo Op=0195 Resp=0005
^z
RECOV Servo Op=0195 Resp=0005
RECOV Servo Op=0195 Resp=0005
Starting LBA of RW Request=00094BDD8F Length=00001DD2
ProcessRWError -Read- at LBA 00094BE9C2 Sense Code=43110081
Common path start quit now
RECOV Servo Op=0195 Resp=0005
ProcessRC: 00000000,00000000
ReadContinuous: 094BE9C2,0000015B
UnrecovSectorCount:015B,015A
NumUDEs: 0000015B,00000000,0000015A
Passed: 00000080,00000115,00000138
Out:
SkipLBA: 094BE9C2,094BEB1C
RECOV Servo Op=0195 Resp=0005
^z
^z
RECOV Servo Op=0195 Resp=0005
RECOV Servo Op=0195 Resp=0005
RECOV Servo Op=0195 Resp=0005
RECOV Servo Op=0195 Resp=0005
Starting LBA of RW Request=00094BDD8F Length=00001DD2
ProcessRWError -Read- at LBA 00094BEB1D Sense Code=43110081^z
RECOV Servo Op=0195 Resp=0005
RECOV Servo Op=0195 Resp=0005
Common path start quit now
ProcessRC: 00000001,00000000
ReadContinuous: 094BEB1D,0000015B
UnrecovSectorCount:015B,015A
NumUDEs: 0000015B,00000000,0000015A
Passed: 00000080,00000115,00000138
Out:
SkipLBA: 094BEB1D,094BEC77
RECOV Servo Op=0195 Resp=0005
RECOV Servo Op=0195 Resp=0005
RECOV Servo Op=0195 Resp=0005
Starting LBA of RW Request=00094BDD8F Length=00001DD2
ProcessRWError -Read- at LBA 00094BEC78 Sense Code=43110081
RECOV Servo Op=0195 Resp=0005
Common path start quit now
ProcessRC: 00000001,00000000
ReadContinuous: 094BEC78,0000015B
UnrecovSectorCount:015B,015A
NumUDEs: 0000015B,00000000,0000015A
Passed: 00000080,00000115,00000138
Out:
SkipLBA: 094BEC78,094BEDD2
RECOV Servo Op=0195 Resp=0005
Starting LBA of RW Request=00094BDD8F Length=00001DD2
ProcessRWError -Read- at LBA 00094BEDD3 Sense Code=43110081
Common path start quit now
ProcessRC: 00000001,00000000
ReadContinuous: 094BEDD3,0000015B
UnrecovSectorCount:015B,015A
NumUDEs: 0000015B,00000000,0000015A
Passed: 00000080,00000115,00000138
Out:
SkipLBA: 094BEDD3,094BEF2D
RECOV Servo Op=0195 Resp=0005
RECOV Servo Op=0195 Resp=0005
Starting LBA of RW Request=00094BDD8F Length=00001DD2
ProcessRWError -Read- at LBA 00094BEF2E Sense Code=43110081
RECOV Servo Op=0195 Resp=0005
Common path start quit now
ProcessRC: 00000001,00000000
ReadContinuous: 094BEF2E,0000015B
UnrecovSectorCount:015B,015A
NumUDEs: 0000015B,00000000,0000015A
Passed: 00000080,00000115,00000138
Out:
SkipLBA: 094BEF2E,094BF088
Starting LBA of RW Request=00094BDD8F Length=00001DD2
ProcessRWError -Read- at LBA 00094BF089 Sense Code=43110081
Common path start quit now
ProcessRC: 00000001,00000000
ReadContinuous: 094BF089,0000015B
UnrecovSectorCount:015B,015A
NumUDEs: 0000015B,00000000,0000015A
Passed: 00000080,00000115,00000138
Out:
SkipLBA: 094BF089,094BF1E3
Starting LBA of RW Request=00094BDD8F Length=00001DD2
ProcessRWError -Read- at LBA 00094BF1E4 Sense Code=43110081
RECOV Servo Op=0195 Resp=0005
Common path start quit now
ProcessRC: 00000001,00000000
ReadContinuous: 094BF1E4,0000015B
UnrecovSectorCount:015B,015A
NumUDEs: 0000015B,00000000,0000015A
Passed: 00000080,00000115,00000138
Out:
SkipLBA: 094BF1E4,094BF33E
Starting LBA of RW Request=00094BDD8F Length=00001DD2
ProcessRWError -Read- at LBA 00094BF33F Sense Code=43110081
Common path start quit now
ProcessRC: 00000001,00000000
ReadContinuous: 094BF33F,0000015B
UnrecovSectorCount:015B,015A
NumUDEs: 0000015B,00000000,0000015A
Passed: 00000080,00000115,00000138
Out:
SkipLBA: 094BF33F,094BF499
RECOV Servo Op=0195 Resp=0005
Starting LBA of RW Request=00094BDD8F Length=00001DD2
ProcessRWError -Read- at LBA 00094BF49A Sense Code=43110081
Common path start quit now
RECOV Servo Op=0195 Resp=0005
ProcessRC: 00000001,00000000
ReadContinuous: 094BF49A,0000015B
UnrecovSectorCount:015B,015A
NumUDEs: 0000015B,00000000,0000015A
Passed: 00000080,00000115,00000138
Out:
SkipLBA: 094BF49A,094BF5F4
RECOV Servo Op=0195 Resp=0005
RECOV Servo Op=0195 Resp=0005
Starting LBA of RW Request=00094BDD8F Length=00001DD2
ProcessRWError -Read- at LBA 00094BF5F5 Sense Code=43110081
RECOV Servo Op=0195 Resp=0005
Common path start quit now
ProcessRC: 00000001,00000000
ReadContinuous: 094BF5F5,0000015B
UnrecovSectorCount:015B,015A
NumUDEs: 0000015B,00000000,0000015A
Passed: 00000080,00000115,00000138
Out:
SkipLBA: 094BF5F5,094BF74F
Starting LBA of RW Request=00094BDD8F Length=00001DD2
ProcessRWError -Read- at LBA 00094BF750 Sense Code=43110081
RECOV Servo Op=0195 Resp=0005
Common path start quit now
ProcessRC: 00000001,00000000
ReadContinuous: 094BF750,0000015B
UnrecovSectorCount:015B,015A
NumUDEs: 0000015B,00000000,0000015A
Passed: 00000080,00000115,00000138
Out:
SkipLBA: 094BF750,094BF8AA
RECOV Servo Op=0195 Resp=0005
RECOV Servo Op=0195 Resp=0005
RECOV Servo Op=0195 Resp=0005
RECOV Servo Op=0195 Resp=0005
RECOV Servo Op=0195 Resp=0005
RECOV Servo Op=0195 Resp=0005
RECOV Servo Op=0195 Resp=0005
RECOV Servo Op=0195 Resp=0005
Starting LBA of RW Request=00094BDD8F Length=00001DD2
ProcessRWError -Read- at LBA 00094BF8AB Sense Code=43110081
RECOV Servo Op=0195 Resp=0005
Common path start quit now
ProcessRC: 00000001,00000000
ReadContinuous: 094BF8AB,0000015B
UnrecovSectorCount:015B,015A
NumUDEs: 0000015B,00000000,0000015A
Passed: 00000080,00000115,00000138
Out:
SkipLBA: 094BF8AB,094BFA05
Starting LBA of RW Request=00094BDD8F Length=00001DD2
ProcessRWError -Read- at LBA 00094BFA06 Sense Code=43110081
Common path start quit now
ProcessRC: 00000001,00000000
ReadContinuous: 094BFA06,0000015B
UnrecovSectorCount:015B,015A
NumUDEs: 0000015B,00000000,0000015A
Passed: 00000080,00000115,00000138
Out:
SkipLBA: 094BFA06,094BFB60
ASCII Diag mode
F3 T>
Search IOEDC Index = 00022340 Index Offset = 00000000
VBMIndex With IOEDC Error =00022340
Uint32 Offset= FFFFFFFF Bit Mask= EEEEEEEE
HostLBA = 000000004A5EEC78
Previous VBM Index = 0003133F
929C1A24 6DCE856D D24C936F 3BDCFC44 CF672598 C1EA773F F819B7C5 6FF9EE16
F5304876 358761C9 EE2ADAA3 C392D8A0 9BCD6CCC 69A0539B 94E40179 374FD572
819E93AA DD5D4C25 BAB125D7 6B68C71C B7ABB600 31763EF7 A34248AD DF05B1AE
5C64DADE 65132881 491F6F0B 333EA278 423601B4 D8CC2553 7F2893E1 66DB9C0A
68C32412 0CE917FD 65E5B6BF DAF48ED4 1E9C48E8 6082018F 0BB6DD15 0E907B66
04A96F46 D4BFF259 304001F3 624D7530 2D7A921C 0858ECEB 261D2449 D66667C2
D337B6FA 7C75DEB4 CC2E4B27 0A03506F F9C0DD50 D02ECB46 F2FB6FFD 7E3C4239
EF92002E 07CBC510 98B4925B ADD93CCB 95AF2484 7BE4B7A2 8141B931 01F22E95
BA784B62 AF81A04C B712DD8F 75AF1B27 A0356E38 03BA921E 5D2C0065 A94815F1
56C69296 77578CA8 43F924C3 1D650783 7C93B96C AB73797A 698A4B99 711EF02D
62ACDDCA 1F2C6B04 1E476E77 A53BE2FF 0B7E00A0 72C965D6 041092CD 18D4DC89
310B277E A6E25660 2A2DB9AB 4CF1C95B 27C44BD4 1A9F4032 D0FEDC01 A0AABBE4
CD916EB2 4EB832DF C68800DF 1447B5B6 F3A29508 A2552F69 EF4527B5 4860A640
987FB9E6 160E193B 95164A13 BC1D9012 8E08DCBC 4A2B0BC5 BB236EE9 103682BC
B4DA031A B9C40597 A1FC9547 47D27F4E 5A9727F0 EDE1F621 5789B81D BB8F6918
40A04A4E 419AE0F3 7C5ADCFB EFA85BAA 697D7124 B5B7D29D 62140351 43455474
06BC36F1 1F211E65 E19FAC68 00000000
VBM Index IOECC Error =00022340
929C1A24 6DCE856D D24C936F 3BDCFC44 CF672598 C1EA773F F819B7C5 6FF9EE16
F5304876 358761C9 EE2ADAA3 C392D8A0 9BCD6CCC 69A0539B 94E40179 374FD572
819E93AA DD5D4C25 BAB125D7 6B68C71C B7ABB600 31763EF7 A34248AD DF05B1AE
5C64DADE 65132881 491F6F0B 333EA278 423601B4 D8CC2553 7F2893E1 66DB9C0A
68C32412 0CE917FD 65E5B6BF DAF48ED4 1E9C48E8 6082018F 0BB6DD15 0E907B66
04A96F46 D4BFF259 304001F3 624D7530 2D7A921C 0858ECEB 261D2449 D66667C2
D337B6FA 7C75DEB4 CC2E4B27 0A03506F F9C0DD50 D02ECB46 F2FB6FFD 7E3C4239
EF92002E 07CBC510 98B4925B ADD93CCB 95AF2484 7BE4B7A2 8141B931 01F22E95
BA784B62 AF81A04C B712DD8F 75AF1B27 A0356E38 03BA921E 5D2C0065 A94815F1
56C69296 77578CA8 43F924C3 1D650783 7C93B96C AB73797A 698A4B99 711EF02D
62ACDDCA 1F2C6B04 1E476E77 A53BE2FF 0B7E00A0 72C965D6 041092CD 18D4DC89
310B277E A6E25660 2A2DB9AB 4CF1C95B 27C44BD4 1A9F4032 D0FEDC01 A0AABBE4
CD916EB2 4EB832DF C68800DF 1447B5B6 F3A29508 A2552F69 EF4527B5 4860A640
987FB9E6 160E193B 95164A13 BC1D9012 8E08DCBC 4A2B0BC5 BB236EE9 103682BC
B4DA031A B9C40597 A1FC9547 47D27F4E 5A9727F0 EDE1F621 5789B81D BB8F6918
40A04A4E 419AE0F3 7C5ADCFB EFA85BAA 697D7124 B5B7D29D 62140351 43455474
6214740E 43455474 28C154D6 00000000
Next VBM Index = 00022341
929C1A24 6DCE856D D24C936F 3BDCFC44 CF672598 C1EA773F F819B7C5 6FF9EE16
F5304876 358761C9 EE2ADAA3 C392D8A0 9BCD6CCC 69A0539B 94E40179 374FD572
819E93AA DD5D4C25 BAB125D7 6B68C71C B7ABB600 31763EF7 A34248AD DF05B1AE
5C64DADE 65132881 491F6F0B 333EA278 423601B4 D8CC2553 7F2893E1 66DB9C0A
68C32412 0CE917FD 65E5B6BF DAF48ED4 1E9C48E8 6082018F 0BB6DD15 0E907B66
04A96F46 D4BFF259 304001F3 624D7530 2D7A921C 0858ECEB 261D2449 D66667C2
D337B6FA 7C75DEB4 CC2E4B27 0A03506F F9C0DD50 D02ECB46 F2FB6FFD 7E3C4239
EF92002E 07CBC510 98B4925B ADD93CCB 95AF2484 7BE4B7A2 8141B931 01F22E95
BA784B62 AF81A04C B712DD8F 75AF1B27 A0356E38 03BA921E 5D2C0065 A94815F1
56C69296 77578CA8 43F924C3 1D650783 7C93B96C AB73797A 698A4B99 711EF02D
62ACDDCA 1F2C6B04 1E476E77 A53BE2FF 0B7E00A0 72C965D6 041092CD 18D4DC89
310B277E A6E25660 2A2DB9AB 4CF1C95B 27C44BD4 1A9F4032 D0FEDC01 A0AABBE4
CD916EB2 4EB832DF C68800DF 1447B5B6 F3A29508 A2552F69 EF4527B5 4860A640
987FB9E6 160E193B 95164A13 BC1D9012 8E08DCBC 4A2B0BC5 BB236EE9 103682BC
B4DA031A B9C40597 A1FC9547 47D27F4E 5A9727F0 EDE1F621 5789B81D BB8F6918
40A04A4E 419AE0F3 7C5ADCFB EFA85BAA 697D7124 B5B7D29D 62140351 43455474
6214740F 43455474 B3954DD8 00000000
RECOV Servo Op=01A5 Resp=0005
Starting LBA of RW Request=00094BDD8F Length=00001C77
ProcessRWError -Write- at LBA 00094BDD8F Sense Code=44808780
RECOV Servo Op=01A5 Resp=0005
Out:
Unretryable write error
LED:0x000000BD FAddr:0x0000988E
LED:0x000000BD FAddr:0x0000988E
LED:0x000000BD FAddr:0x0000988E
Tools used in this data recovery cases:
DFL-SRP USB3.0 all-in-one Data Recovery Equipment