Posts

This is one advanced proven data recovery solution or tip to recover lost data from Western Digital SMR scratched hard drives.

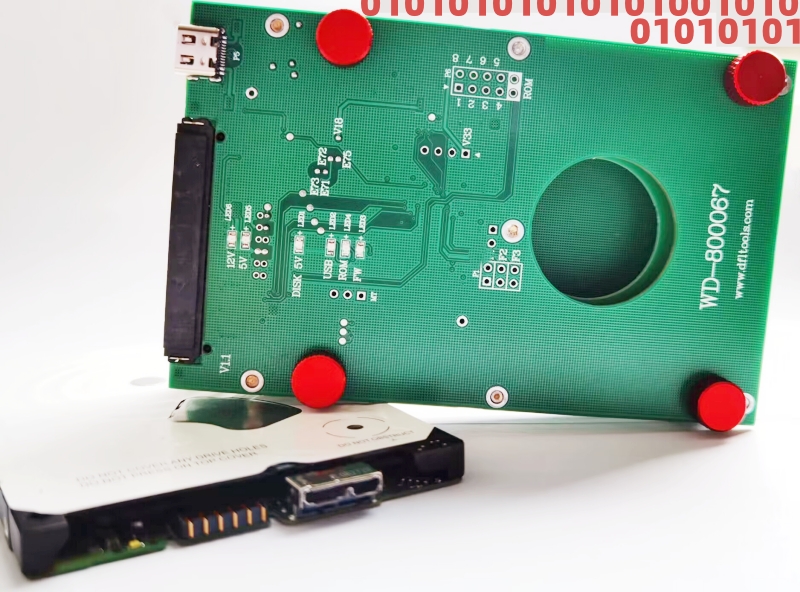
For WD SMR drives, if one head is damaged physically, the whole head stack is gone, the patient drive gets undetected and busy.

For WD SMR hard drives, if the platters are scratched, some heads are totally damaged, to recover the lost data, what to do then?

Please note: to recover lost data from scratched hard drives, specially WD SMR drives, beginners in data recovery field are not recommended to buy this solution because the success rate is affected by many factors, not only the method of accessing the key technology, for example, users need to have good skills of head and platter swap, platter and heads cleaning, platter alignment, hdd inner environment cleaning, firmware repair skills, etc.

Get this Unique WD SMR Scratched HDD Data Recovery Solution now

Please note: it’s not possible to recover 100% data from scratched hard drives. The basic principle is to recover all good sectors first and then weak sectors and then bad sectors, etc.

For many WD SMR patient drives, the weak heads or bad sectors data recovery cases are very common and selective head image is very necessary and used a lot.

To run selective head image for WD SMR drives, users can follow the steps below:

01: Unlock the SA by writing unlock rom or swap the original PCB with firmware unlock PCB;
02: Disable 411 in kernel mode and restart firmware;
03: Backup T2Data and module 190;
04: Set up disk image task, select Head Map and select 190 or T2 data to set up head map;
05: After head map is set up, users can select good heads to image first and then weak heads.

To recover lost data from Western Digital SMR hard drives, one of the most important steps is to backup the module 190 successfully.

For WD SMR drives’ data recovery cases, it is very common the module 190 backup may fail due to its large size, bad sectors or weak heads, etc. At this situation, users can follow the instructions below to increase the success rate of module 190 backup. Besides, users need to be very careful of the right steps to backup module 190.

WD SMR drives have MCU lock, users need to remove the MCU lock by the following methods:

01: Remove MCU lock by writing unlock ROM;
02: Remove MCU lock by firmware unlock PCB.

WD SMR Drives Module 190 Backup Steps:

01: Remove MCU lock;
02: Enter DFL-WD firmware repair software and disable 411;
03: Re-enter the WD software and backup the module 190 and other important firmware modules; When users are reading the module 190, users have the following modes to read the module 190 successfully:

Mode 1: Read 190 of copy 0 by ABA fully;
Mode 2: Read 190 of copy 1 by ABA fully;
Mode 3: Read 190 valid data only of copy 0 by ABA fully;
Mode 4: Read 190 valid data only of copy 1 by ABA fully;
Mode 5: Read 190 fully by ID;
Mode 6: Read 190 valid data only by ID.

Users can select different modes to read the module 190 successfully according to the hard drive diagnosis. If users have deleted or formatted data data to recover, it’s better to backup the 190 fully. But if there’re read errors during reading 190, users can try valid data only backup.

To recover lost data from WD SMR formatted HDD, the PC users need to stop the power immediately and stop working on it any further, specially stop writing any new data on the formatted hdd. As for data recovery engineers, they need to bypass the firmware read(disable 411) firstly, backup the important firmware modules, specially the module 190.

HDD Firmware Repair Tools and Data Recovery Tools Required To recover lost data from formatted WD SMR HDDs:

DFL-WD HDD Firmware Repair Tool
DFL-DDP Data Recovery Equipment

Steps to recover lost data from WD SMR Formatted HDD:

01: MCU unlock by writing unlock ROM with HDD ROM chip pin reader or swap with firmware unlock PCB;
02: Enter secured firmware operations mode to avoid the dynamic translator corruption;
03: Backup the dynamic translator module 190 and repair 190 automatically to get a good copy of T2Data;
04: Accelerate the firmware loading process;
05: Test firmware modules and repair found corrupted modules;
06: Load T2Data to RAM(Auto mode) to access the data area fully.

The following are some example videos or related videos to recover lost data from WD SMR formatted HDDs:

WD SMR HDD Palmer 800066 800069 Format Data Recovery
WD SMR HDD 1.5T Data Recovered From 0.03GB Patient HDD by Module 190 Auto Repair

Video case study and free WD SMR hdd data recovery training video: WD40NDZW 11BHVS1 WD SMR 810033 Undetected HDD Data Recovery Steps

Top recommended WD SMR 8x00xx HDD USB to SATA adapters for best success rate.

Must-read WD SMR HDD Data Recovery Cases and Tips

To all Dolphin DFL users:

Recently we have received many WD SMR hdd data recovery cases by remote support system from Dolphin users worldwide and Dolphin engineers have found many issues and wrong operations from users’ side:

01: Some users get one patient WD SMR HDD and go to extract lost data directly without doing any firmware backup or further diagnosis;
02: Some users backup firmware modules directly without disable 411, this adds to the risk of damaging original module 190;
03: Some users use the same firmware repair concept for old WD drives to repair WD SMR drives without firmware backup;
04: Some users receive failed WD SMR HDD cases from other data recovery companies without any original firmware backup. The user needs to remind the hdd owner to ask for the first copy of firmware modules, specially the original module 190, otherwise, it can be not possible to recover the lost data;
05: Some users extract the files directly instead of imaging the patient unstable HDD. This adds to the risk of further damage to heads or surfaces.

Correct Steps to Recover Lost Data from WD SMR HDDs:

01: Unlock firmware area by writing unlock rom to original pcb or change one sata firmware unlock pcb;
02: Disable 411 and backup 190 and T2data;
03: Backup other important firmware modules;
04: Test firmware modules and find which ones are corrupted;
05: Repair damaged firmware modules;
06: Repair WD SMR HDD slow issue, please note not the common slow fix, use the special WD SMR hdd slow repair solutions;
07: Load T2data to RAM if necessary after entering DFL-DDP data recovery software;
08: Set up head map for patient HDD and image good heads first;
09: Image patient HDD.

Top recommended WD SMR 8x00xx HDD USB to SATA adapters for best success rate.

Any question is welcome to sales[at]dolphindatalab.com and this is also the teams ID for live support.

This is one very successful Western Digital SMR Charger hard drive firmware repair and data recovery case. This patient charger hard drive spun up and down repeatedly and seemed like head failure but actually not.

The user tried to swap heads of the patient hard drive but the failure symptoms remained the same.

With the help of Dolphin remote support engineer, the user changed the original heads back to patient hdd.

To recover lost data from this failed charger drive, the user converted the USB interface to SATA by G3 800067 USB to SATA data recovery adapter, backup the original ROM, generate unlock rom by DFL-WD firmware repair tool, disable 411 and write unlock rom.

Next the engineer made a backup of the important firmware modules, specially the module 190, both copy 0 and copy 1. After testing the module 190, the copy 0 190 was corrupted but copy 1 was still good. So the engineer wrote copy 1 190 to copy 0. It was very lucky after the good copy of 190 was written, the engineer enabled 411, power off and on and the patient hdd was repaired successfully.

In many cases, both copies of 190 were corrupted and users need to use DFL-DDP data recovery tool to repair the 190 and finally users need to load the 190 or T2Data to the RAM automatically to fix the all 0000 issue.

Any question is welcome to sales@dolphindatalab.com or add Dolphin Skype ID: dolphin.data.lab

G3(Generation 3) WD SMR HDD 800067 USB-SATA Data Recovery Adapter Pro. is created to make WD SMR USB HDD data recovery easier and more successful. After using this 800067 G3 adapter, users can easily work on the 800067 USB hdd by SATA interface without the SED headache.

G3 WD SMR HDD 800067 USB-SATA Data Recovery Adapter Pro. contains the following items:

01: 800067 USB to SATA connector;
02: USB Type-C Cable;
03: Software to read/write 800067 USB HDD rom and adjust SATA data signals.

Wow Features of G3 WD SMR HDD 800067 USB-SATA Data Recovery Adapter Pro.

01: Super easy to install this G3 SATA adapter to the 800067 USB PCB;
02: Independent simple software to read rom, write rom directly without using flash programmer;
03: Buffer chip used and users can use the given simple software to adjust the SATA data signals to make firmware operations, disk image and file extraction faster and make data transfer more stable, this makes it possible to bypass the capacitors removal;
04: Power stabilizator is used;
05: ESD protection is adopted.

Steps to use G3 WD SMR HDD 800067 USB-SATA Data Recovery Adapter Pro.

01: Install 800067 G3 SATA adapter;
02: Read original 800067 ROM with G3 adapter software;
03: Generate unlock rom by DFL-WD firmware repair tool;
04: Write unlock rom with G3 adapter software;
05: Disable 411 and backup firmware modules, specially module 190;
06: Test firmware modules and repair corrupted firmware modules;
07: Image patient drive or extract lost data directly.

Users can order this Super Version of WD SMR 800067 USB-SATA HDD Data Recovery Adapter here.

Any question is welcome to sales@dolphindatalab.com or add Dolphin Skype ID: dolphin.data.lab

Dolphin Data Lab has created one unique firmware repair and data recovery solution for Western Digital slow hard drives including the WD SMR hard drives. This new function is called ‘Adjust Adaptive Parameters’.

Western Digital HDD Slow Issue types:

01: Firmware slow-users can fix the corrupted firmware modules to fix the slow issue. DFL-WD HDD Repair Tool offers one-click slow fix solutions: Common>Common Repair>Slow Fix for traditional WD hard drives and DFL-DDP data recovery tool offers easy-to-use slow fix for WD SMR hard drives: DDP>Western Digital>Change Disk Configuration>Set the sector r/w response time.

02: Physical slow-users need to use the new data recovery solution to enhance the head r/w capabilities and make the drives read/write quickly. Menu path within DFL-WD hdd repair tool: Common>Adjust Adaptive Parameters

Please note: Some WD hard drives are full of bad sectors due to head corruption and users need to swap heads to fix and get lost data back.

Users can watch the video instruction here on how to use ‘Adjust Adaptive Parameters’ for data recovery without head swap.

Any question is welcome to sales@dolphindatalab.com or add Dolphin Skype ID: dolphin.data.lab

This is one successful case study of Western Digital Palmer HDD with PCB number 800069 for one DFL user in Italy.

Patient HDD ID:
WD10SMZW-11Y0TS0
PCB: 800069

Patient HDD Failure Symptoms:
Undetected
Data area was not accessed

WD SMR Palmer HDD Repair and Data Recovery Steps:

01: The user has swapped with one firmware unlock PCB of 800066 and the patient HDD was connected to DFL-SRP data recovery hardware;
02: Enter Kernel mode, backup rom, disable 411;
03: Firmware restart and re-enter program;
04: Backup firmware module 190;
05: Test firmware modules and found module 03 was damaged, checksum error;
06: Repaired module 190 and fixed the 03 corruption issue;
07: Enable 411 and firmware restart;
08: Install original 800069 USB PCB back and connected the external HDD to DFL-URE;
08: Load module 190/T2data to RAM within the data recovery software.

HDD Repair Tools and Data Recovery Tools used in this case study:

DFL-WD hdd repair tool
DFL-URE data recovery software

Any question is welcome to sales@dolphindatalab.com or add Dolphin Skype ID: dolphin.data.lab