HDD Repair Steps of DFL-WDII To Kill Zones For WD HDD ROYL Series
With DFL-WDII hdd firmware repair tool, users are able to kill zones with bad sectors or zones with bad heads.
You need firstly locate the bad sectors or bad heads by scanning the hdd and then use CHS<>LBA for conversion. After that, you can record the zone information of bad sectors so that you can move forward to ‘Kill Zone’ interface.
The following are the hdd repair steps you can follow to kill zones successfully:
- Clear G-list, P-list, Smart;
- Clear Translator;
- (If the zones are killed directly without performing above two steps, the hdd firmware module 03 will be damaged and will suffer clicking noises or become undetected.)
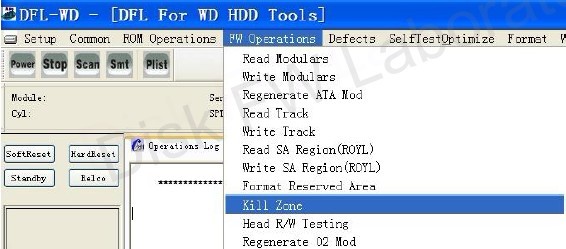
- Kill Zones;
- (The ID and capacity value of Module 02 will be edited automatically after zone killing)
- Power off and power on and format with P-list/(format the data area);
- After killing the zones, the translator can be built by format. If there’re many defects, you can run selftest to keep adding defects to P-list. Otherwise, you just need to scan and add the defects and then format the SA area.
You can learn more about hdd repair tips of DFL-WDII HDD firmware repair tool.


